
Getting started with a flat-band slingshot can feel overwhelming with all the different setups out there. But target shooting is simple once you master the fundamentals. Follow this straightforward, step-by-step routine to get on target quickly and safely.
1. The Stance and Grip
The Line-Up: Stand completely parallel to your target. Imagine a straight line running directly from the target, through your leading shoulder, across your chest, and through your back shoulder. Your feet should line up the exact same way.
The Ammo Hand: Place the ammo in the pouch and hold it in your dominant hand (the hand you write with). Pinch the ball between your thumb and the first knuckle of your index finger. This precise, clean grip prevents "hand plucking" and ensures a smooth, clean release.
The Frame Hand: Hold the catapult frame in your non-dominant hand. Turn the frame 90 degrees sideways so the forks are pointing horizontally along the horizon, not up to the clouds. When you extend your arm, make sure the frame is completely square to the target and the forks are perfectly square (perpendicular) to the ground. Any slight twist or tilt in the frame will unevenly stretch the bands and cause your shots to pull offline.Type & Creating Your Sight Line
2
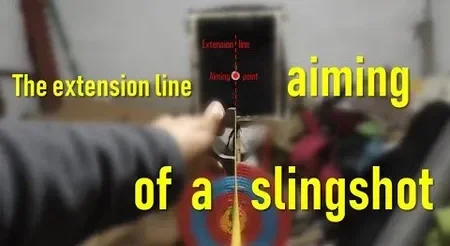
.Sighting Your Frame Type & Creating Your Sight Line
All quality UK target frames are designed so that you pull the latex against the fork (relying on the wrap-and-tuck method, rather than clips or friction plugs to hold the bands on).
To aim properly, you must look directly down the bands. Your goal is to create a perfectly straight line with your eye: the pouch, the fork, and the target must all sit in a single, aligned line of sight.
Depending on how your bands are tied, use the following visual reference points along that line:
Through-The-Fork (TTF): Aim using the centre of the top band.
Over-The-Top (OTT): Aim right off the top corner tip of the upper fork.
3. The Draw and Finding Your Anchor
Extend your frame hand straight out toward the target, and pull the bands back toward your face.
Your anchor point (where you hold the pouch against your face) is your rear sight. Because different frame widths change your line of sight, use this rough guide to find your starting anchor point:
100mm Frame: Pull the pouch back to the corner of your mouth.
90mm Frame: Anchor just under your cheekbone.
80mm Frame: Anchor directly on your cheekbone.
Once you are in position and everything is lined up, release cleanly. Make tiny, consistent adjustments to this anchor point until you dial in your personal sweet spot.
4. Getting the Right Gear
The Best Starting Setup
The Frame: A 90mm width frame is the absolute sweet spot for beginners. For a top-tier, reliable frame, buy directly from proven UK makers such as Leightons Catty's, Wasp Slingshots, or Hegarty Slings.
The Ammo: Start with biodegradable clay ammo or 8mm steel balls.
Pro Tip: For expert, friendly, and free advice on band setups, check out Natty Catty Bands on social media or their website.
5. Band and Taper Blueprint
The single biggest mistake new shooters make is using overpowered bands. Heavy bands do not automatically mean more speed; in fact, bands that are too thick for your ammo will actually drag, ruin your accuracy, and cause violent hand slap.
Use this proven blueprint to match your ammo to the correct latex thickness and cutting template:
🎯 The Perfect Setup by Ammo Type
🟢 1. Clay & 7mm Steel Setup (The Practice & Backyard Standard)
This setup is light, incredibly easy to draw, and perfect for building muscle memory without wearing out your arms.
Latex Thickness: 0.45 mm
Cutting Template: 18-12 (tapers from 18mm at the fork to 12mm at the pouch)
Why it works: It offers high speed with very low draw weight. Perfect for keeping clay shots flat and accurate at typical garden distances.
🔵 2. 8mm Steel Setup (The UK Target Standard)
This is the sweet spot for serious target shooting. It balances clean wind resistance with incredibly consistent, smooth performance.
Latex Thickness: 0.50 mm to 0.60 mm
Cutting Template: 20-12 (tapers from 20mm at the fork to 12mm at the pouch)
Why it works: The gold-standard UK target band setup. It matches the weight of 8mm steel perfectly to maximise speed without heavy hand slap or frame vibration.
🔴 3. 9.5mm Steel Setup (The Heavy Hitter)
For shooters who want maximum authority on knock-down targets.
Latex Thickness: 0.60 mm to 0.65 mm
Cutting Template: 20-15 (tapers from 20mm at the fork to 15mm at the pouch)
Why it works: The wider 15mm pouch-end and thicker latex deliver the heavy driving power required to cleanly push 9.5mm steel downrange with a flat trajectory.
The Golden Rule for Blog Readers: Thicker bands do not automatically mean more speed! If you use 0.65 mm bands with light clay ammo, the heavy rubber actually slows itself down and slaps your hand. Always match your latex to your ammo size.
6. Adjusting Your Height & Distance
Most target shooters practice at distances between 10 to 15 meters. Once you have your basic setup down, you will need to dial in your vertical height. There are two main ways to adjust if your shots are hitting too high or too low:
Method A: Adjusting Your Anchor Point (Most Common)
If you prefer to keep your aim point locked on the very top corner of the fork, you can adjust your height by slightly moving where you anchor on your face:
If you are shooting too low: Lower your anchor point on your face. Lowering the anchor tilts the front of the frame up, raising the ball's point of impact.
If you are shooting too high: Raise your anchor point on your face.
Method B: Adjusting Your Fork Reference (Fixed Anchor)
If you prefer to keep your face anchor completely locked in the exact same physical spot, you can adjust your height by changing where you look on the fork tip:
At 10 meters: You might reference 5mm down from the tip of the fork.
As you move further away: Because gravity causes the ball to drop over distance, you must aim further down the fork to elevate the frame and compensate for the drop.
A Note for TTF (Through-The-Fork) Shooters
TTF shooters handle distance adjustments slightly differently. They will typically either adjust their anchor point on their face, or start by aiming slightly above the target (for example, 1cm above the target). As they move further away from the target, they will bring their aiming point closer and closer down to the actual fork tip.
